
| << Previous Post | | Visit my Traditional Programming Blog | | Next Post >> |
This post is primarily focused on getting started with the Arduino. There are many versions of the Arduino. You have 8-bit and 32-bit versions. Then there is the Nano, Mini, Uno, Mega. For most developmental purposes the Arduino UNO R3 can be used.
While ordering the Arduino
It would be best to order an Arduino UNO R3 Starter Kit that contains everything you need to get started with the Arduino. Double check whether your kit includes at least the bare minimum such as:
Go the extra mile and order an outer Protective Jacket/Box for your Arduino. It is an invaluable asset and will save you away from the constant risk of damaging your Arduino from external shocks and injury.
While ordering the Arduino
It would be best to order an Arduino UNO R3 Starter Kit that contains everything you need to get started with the Arduino. Double check whether your kit includes at least the bare minimum such as:
 |
| Figure 1 - A typical Arduino Starter Kit |
- The Arduino UNO R3 mainboard
- An USB A to B connector cable. USB Type A is the port on a computer while USB Type B is the port on the Arduino mainboard.
- 1 Breadboard
- Some Jumper Wires
- Resistors, Transistors and Diodes
- Optional - Most vendors usually also provide some LEDs and Buttons
- Optional - Some vendors may or may not provide sensors (temperature) and actuators (motors)
- If you get more from a vendor for the same price, then better!
Go the extra mile and order an outer Protective Jacket/Box for your Arduino. It is an invaluable asset and will save you away from the constant risk of damaging your Arduino from external shocks and injury.
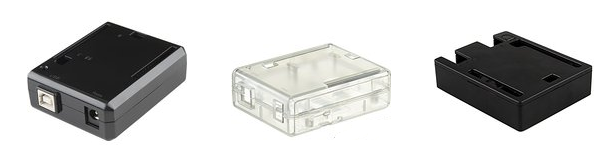 |
| Figure 2 - Some varieties of Arduino Cases/Boxes/Enclosures |
Also order an Anti-Static Wrist Band for your Arduino. Believe me it will go miles in saving your precious electronics from static electric discharge from contact with your body (specially if you intend to work out of dry and cold weather conditions).
 |
| Figure 3 - Some varieties of Anti-Static Wrist Bands/Straps |
Setting up and taking care of your Arduino
Once you have received your kit it becomes very important to handle the Arduino with care. Since there are a lot of delicate electronics involved, you will have to be very careful.
First, make sure you are free of static electricity. Touch some metal before handling the Arduino. Also wear your Anti Static wrist band for precaution.
The second important step is to encase your Arduino in the protective outer Jacket/Box. Believe me, I learnt it the hard way - don't leave your Arduino mainboard bare on your table. There are many ways it can get impacted from external influences.
And at last, the golden rules: be gentle when plugging in the jumper wires into the Arduino pins; and avoiding any liquids near or above the surface level of the Arduino mainboard. Also store the Arduino in a dry and moderate temperature. Avoid heat and humidity to keep your prized powerhouse chip going on and on for years of innovation to trickle out of your grey cells.
Cheers!
KB
KB
No comments:
Post a Comment